How to Fix a Printer That Prints with a Black Line
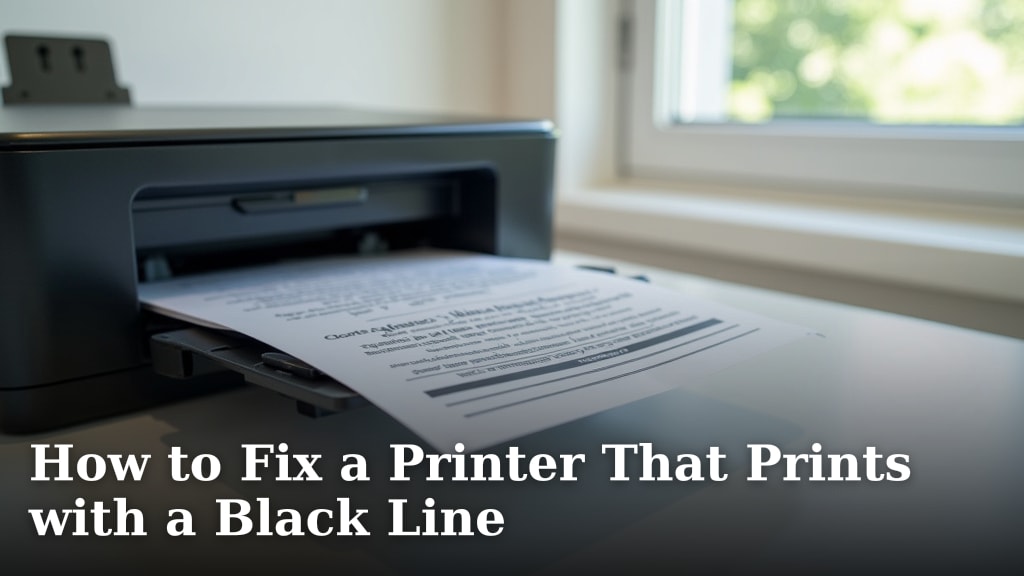
If your printer is leaving a frustrating black line on every page, you’re not alone. Often, this is caused by dirt or damage on the print head. Thankfully, it’s usually a fixable problem you can tackle right at home without needing a repair person.
Seeing a dark streak across your important documents can be maddening. We understand how disruptive this is to your printing needs. The good news is that several common issues can lead to this, and we’ve found that addressing them typically involves cleaning or inspecting key printer parts.
- Check for dirt on the print head.
- Run a print head cleaning cycle.
- Inspect the ink cartridge.
- Try a test print.
Ready to get your printer back to producing clean, crisp pages? Let’s walk through the simple steps to diagnose and fix that annoying black line.
Solving Your Printer’s Black Line Problem
If you’re seeing a persistent black line on your printed pages, it’s a common issue that many people face. You’re probably wondering what’s causing this streak and how you can fix it without spending a fortune. We’ve found that most of the time, this problem stems from a straightforward issue that you can often resolve yourself.
The good news is that this doesn’t usually mean your printer is beyond repair. In fact, most black line issues are caused by something simple like dirt or a minor obstruction. Let’s get your printer working perfectly again.
Understanding the Cause of Black Lines
Before we dive into the fixes, it helps to understand why these lines appear. They are typically caused by something physically obstructing the ink from being applied correctly or uniformly to the paper. This obstruction can be on the print head itself, or sometimes it’s related to the ink cartridge or even a roller. Before we dive into the fixes, it helps to understand what printer toner is made of and why these lines appear.
Think of it like a pen running over a tiny piece of grit. The ink flow gets interrupted, leaving a mark. Your printer’s print head is incredibly precise, and even a tiny speck of dust or dried ink can cause a noticeable line.
The Role of the Print Head
The print head is the component in your printer that actually sprays the ink onto the paper. It has thousands of tiny nozzles that open and close rapidly to create images and text. If any of these nozzles are blocked or if there’s dirt on the surface of the print head, it can leave a dark streak.
We found that many print head issues are preventable with regular maintenance. However, even with care, dust and environmental debris can find their way onto this sensitive part. This is why cleaning the print head is often the first and most effective solution.
Ink Cartridges and Debris
Sometimes, the issue isn’t directly with the print head itself, but with the ink cartridge. The cartridge works closely with the print head. If there’s debris on the contacts between the cartridge and the printer, or if the cartridge itself has a defect, it can lead to printing problems.
We’ve seen cases where a small piece of packaging material or a stray fiber from a paper towel can cause a temporary blockage. Inspecting the cartridge area is a logical next step if a direct print head clean doesn’t work.
Step-by-Step Solutions for Black Lines
Now that you know the common culprits, let’s walk through the ways you can fix this. We’ll start with the easiest and most common solutions, moving to slightly more involved steps if needed.
1. Run the Printer’s Built-in Cleaning Cycle
Most modern printers come with a self-cleaning function. This is designed to clear out clogged nozzles on the print head. It’s like a tiny internal shower for your printer’s ink system. We highly recommend trying this first.
How to Access the Cleaning Cycle
The exact steps vary by printer model. Generally, you’ll need to access your printer’s control panel or settings menu. Look for options like “Maintenance,” “Tools,” or “Printer Properties.” Within those menus, you should find a “Head Cleaning” or “Clean Print Head” option. Follow the on-screen prompts.
Running Multiple Cleaning Cycles
Sometimes, one cleaning cycle isn’t enough, especially if the blockage is significant. Many experts recommend running the cleaning cycle 2-3 times in a row. After each cycle, it’s a good idea to print a test page to see if the line has disappeared. Don’t run it too many times consecutively, as this can waste ink.
We found that for stubborn clogs, allowing the printer to rest for a few hours between cleaning cycles can sometimes be beneficial. This gives the cleaning solution time to work on the dried ink.
2. Manually Clean the Print Head (If Accessible)
If the automatic cleaning cycle doesn’t solve the problem, you might need to manually clean the print head. This requires a bit more hands-on effort and caution. It’s important to only attempt this if your printer’s manual allows for it, or if you’re comfortable.
Preparing for Manual Cleaning
First, you’ll need to turn off your printer and unplug it for safety. Then, you’ll need to access the print head. Consult your printer’s manual to see how to do this. Some printers allow you to manually move the print head carriage to the center after powering off and unplugging. Others might require you to open a specific cover.
Make sure you have the right cleaning supplies. We found that distilled water or a specialized print head cleaning solution works best. You’ll also need lint-free cloths or swabs. Avoid using regular paper towels, as they can leave fibers behind.
The Cleaning Process
Lightly dampen a lint-free cloth or swab with the cleaning solution. Gently wipe the bottom of the print head where the ink nozzles are located. Be careful not to use too much liquid. The goal is to dissolve any dried ink or debris, not to soak the print head.
If you see a dark line on the print head itself, that’s likely your culprit. Gently try to wipe it away. You might need to repeat this process a few times, using a clean part of the cloth each time. After cleaning, let the print head air dry completely for about 15-20 minutes before powering your printer back on.
3. Inspect and Clean Ink Cartridge Contacts
As we mentioned, the ink cartridge plays a role. Sometimes, dirt or ink residue on the electrical contacts between the cartridge and the printer can cause issues. This can interfere with the printer’s ability to communicate properly with the cartridge, leading to print errors.
Locating the Cartridge Contacts
After powering off and unplugging your printer, open the ink cartridge access door. Remove the ink cartridge that is associated with the color of the line you’re seeing (usually black). Look for small, usually gold or copper-colored contacts on both the cartridge and inside the printer carriage where the cartridge sits. Make sure you’re looking at the right contacts – they are usually in a row or a specific pattern.
Cleaning the Contacts
Use a dry, lint-free cloth or a cotton swab to gently wipe these contacts. If there’s stubborn residue, you can slightly dampen the cloth or swab with distilled water or isopropyl alcohol (rubbing alcohol). Wipe gently, then allow the contacts to dry completely before reinserting the cartridge. We found that this simple step can resolve many intermittent printing problems.
4. Check for Physical Obstructions in the Paper Path
Less common, but still possible, is that a small piece of paper, a staple, or another foreign object is stuck somewhere in the paper path. This could be snagging on the print head or rollers as paper feeds through, causing a line.
Carefully inspect the paper input tray, the output tray, and any accessible internal areas. You might need a flashlight to see into darker corners. Remove any obstructions you find. Sometimes, you can gently remove a snagged piece of paper by pulling it slowly in the direction of the paper path. Be patient and avoid tearing the paper further.
5. Test Your Fixes with a Print Test
After performing any of these cleaning or inspection steps, it’s crucial to test your work. Printing a test page or a simple document will show you if the black line is gone. Many printers have a built-in test page function, which you can usually find in the maintenance or settings menu.
If the line is still there after one attempt, don’t get discouraged! Sometimes, it takes a combination of steps or repeating a cleaning cycle. We recommend trying the test print after each significant step you take.
When to Consider Replacing the Cartridge or Printer
While most black line issues are fixable, there are times when the problem might be more serious. If you’ve tried all the cleaning and inspection steps and the line persists, it might be time to consider other possibilities.
The Ink Cartridge Might Be the Culprit
If you’ve cleaned the print head thoroughly and the line remains, your ink cartridge could be faulty. This is especially true if you’ve recently installed a new cartridge and the problem started immediately. Try installing a different, known-good ink cartridge (preferably a genuine one from the manufacturer) to see if that resolves the issue.
We found that sometimes, even new cartridges can have manufacturing defects. If the problem disappears with a new cartridge, then the old one was likely the source of the black line.
Potential Print Head Damage
In rare cases, the print head itself might be physically damaged. This could happen if something was forced into the printer, or if there was an electrical surge. If you can see physical damage like a crack or a bent nozzle area on the print head (after safely accessing it), it may be irreparable.
At this point, you have a few options. You could explore if your printer model has a replaceable print head (some do, some don’t). If not, and if the printer is older or less expensive, it might be more cost-effective to replace the entire printer. We always advise checking the cost of a replacement print head versus a new printer before making a decision.
Here’s a quick checklist to help you stay organized:
- Confirm the black line appears on all pages.
- Run the automatic print head cleaning cycle 2-3 times.
- Manually clean the print head if accessible and comfortable.
- Inspect and clean the ink cartridge and printer contacts.
- Check the paper path for any obstructions.
- Print a test page after each major step.
Conclusion
You’ve learned that a black line on your prints is often a fixable issue. We’ve walked through simple steps like running automatic cleaning cycles and manually cleaning the print head. We also covered checking ink cartridge contacts and the paper path for obstructions. If these steps don’t resolve the problem, it’s worth considering a faulty ink cartridge or even potential damage to the print head itself. Don’t let a stubborn line stop you from printing; tackle it with these straightforward solutions. Your next step should be to try the automated cleaning cycle again, or proceed with manual cleaning if you feel comfortable.
Frequently Asked Questions
How often should I run a print head cleaning cycle?
We recommend running the automated print head cleaning cycle 2-3 times if you notice a black line. Avoid running it excessively, as this uses up ink. If the problem persists after a few cycles, let the printer rest for a few hours before trying again or moving to manual cleaning.
Can I use regular tap water to clean the print head?
No, we advise against using tap water. Tap water contains minerals that can leave deposits and actually worsen clogs. Always use distilled water or a specialized print head cleaning solution for the best and safest results.
What if the black line only appears sometimes?
Intermittent lines can be tricky. Often, this points to a connection issue. We found that cleaning the electrical contacts on the ink cartridge and inside the printer carriage can resolve this. Ensure these contacts are clean and dry before reinserting the cartridge.
My printer’s manual doesn’t explain manual print head cleaning. What should I do?
If your manual doesn’t cover manual cleaning, it might be a feature the manufacturer doesn’t support. In this case, we suggest relying on the automatic cleaning cycles. If those don’t work, and you’re not comfortable proceeding without guidance, it might be best to consult a professional or consider replacing the printer.
How do I know if the ink cartridge is the problem?
If you’ve performed all the print head cleaning steps and the line remains, the ink cartridge is a prime suspect. The easiest way to test this is to swap it out for a new, known-good cartridge, preferably an official one from the manufacturer. If the line disappears with the new cartridge, your old one was likely the issue.